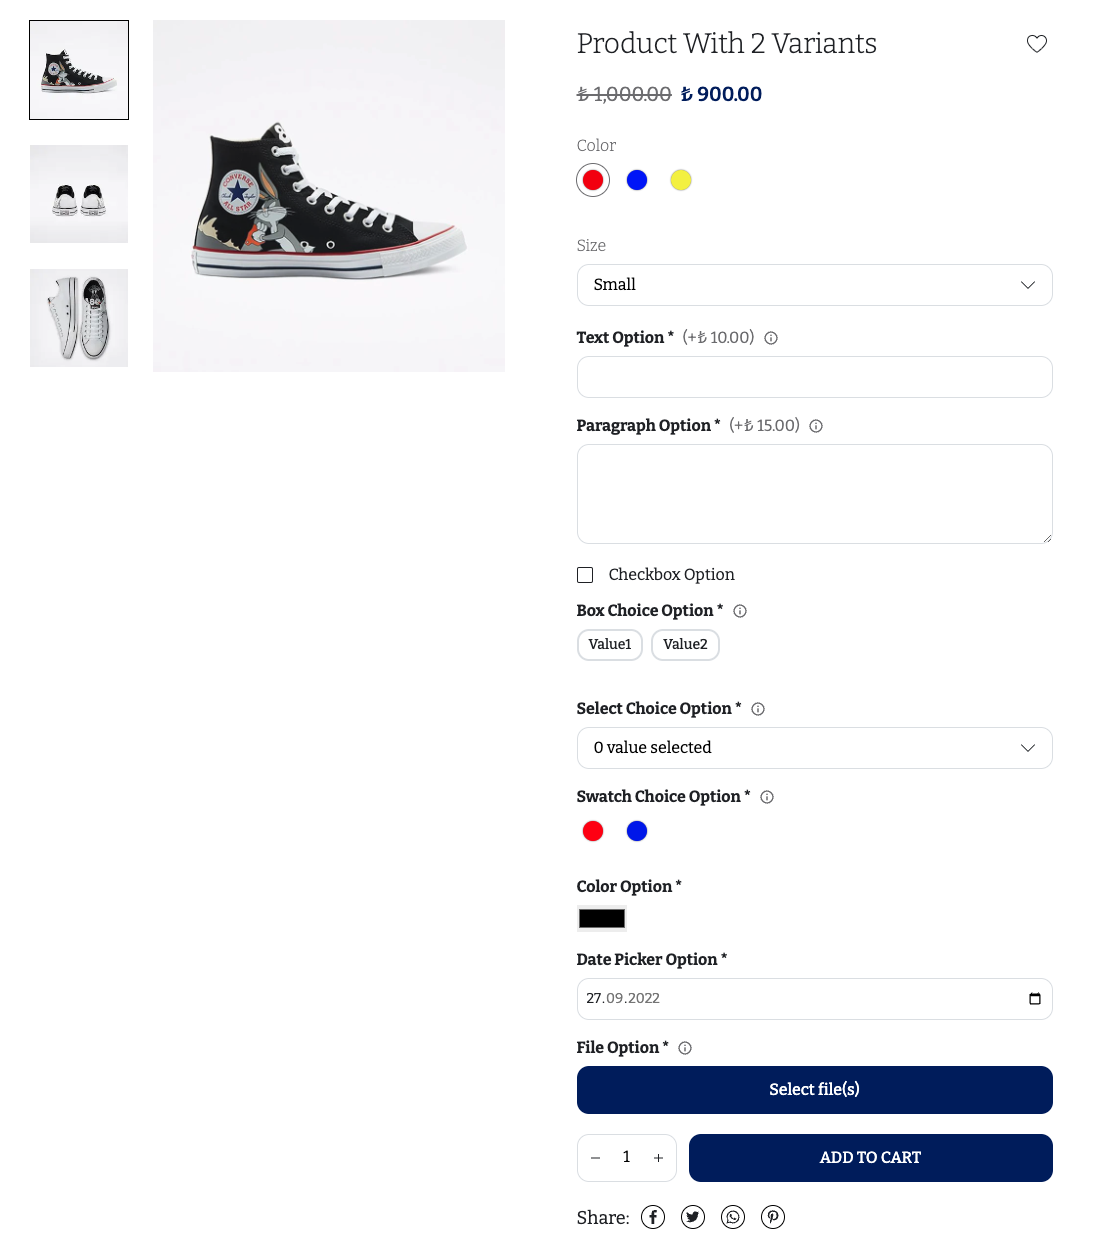
Product Options
Product options are the way ikas merchants allow their customers customize the product they are purchasing. To learn more about them, please check the Product Option Set page.

The screenshot above displays every possible option type. Here is how the top level ProductOptions component looks like.
export const ProductOptions = observer((props: ProductDetailProps) => {
  if (!props.product.productOptionSet) return null;
  const showOptionError = ProductOptionsStore.getInstance().showOptionError;

  return (
    <div aria-label="product-options">
      {props.product.productOptionSet.displayedOptions.map((option, index) => (
        <ProductOption
          key={index + option.id}
          depth={0}
          option={option}
          product={props.product}
          showOptionError={showOptionError}
        />
      ))}
    </div>
  );
});
We created a ProductOption component, in which we switch between rendering different option types. Notice that to render options, we used the product.productOptionSet.displayedOptions. This field will do all the filtering/ordering of the options for you.
const ProductOption: React.FC<Props> = observer(({ showOptionError, option, product, depth, ...props }) => {
  const subNS = `${NS}:detail.productOptions`;
  const [Option, setOption] = React.useState<React.FC<{
    namespace: string;
    option: IkasProductOption;
    product: IkasProduct;
    showOptionError: boolean;
  }> | null>(null);

  useEffect(() => {
    switch (option.type) {
      case IkasProductOptionType.TEXT:
        setOption(ProductOptionText);
        break;
      case IkasProductOptionType.TEXT_AREA:
        setOption(ProductOptionTextarea);
        break;
      case IkasProductOptionType.CHECKBOX:
        setOption(ProductOptionCheckbox);
        break;
      case IkasProductOptionType.CHOICE:
        setOption(ProductOptionChoice);
        break;
      case IkasProductOptionType.COLOR_PICKER:
        setOption(ProductOptionColorPicker);
        break;
      case IkasProductOptionType.DATE_PICKER:
        setOption(ProductOptionDatePicker);
        break;
      case IkasProductOptionType.FILE:
        setOption(ProductOptionFile);
        break;
    }
  }, [option, product, showOptionError]);

  return (
    <>
      {!!Option && <Option namespace={subNS} option={option} product={product} showOptionError={showOptionError} />}
      {option.displayedChildOptions.length > 0 &&
        option.displayedChildOptions.map((childOption) => (
          <ProductOption
            key={`${depth}-${childOption.id}`}
            depth={depth + 1}
            option={childOption}
            product={product}
            showOptionError={showOptionError}
          />
        ))}
    </>
  );
});
After we render the parent option itself, we use the option.displayedChildOptions to render the childs of the option. Parent-child relationship is created when the merchant selects the Show this option if another option is selected checkbox while creating the product options.
It would be a very long and hard to read documentation, if we were to show the code for all types here. Instead, we list the important things to look out for when you examine the source code for product options.
option.values is the field to set when the customer selects a value. Every type has its different value format, check each sub-component to see how they set this field.
Options might have validation rules. They can be required or optional. If the merchant adds a validation rule while creating the product options, the theme should also check these rules. option.hasValidValues field checks if the option.values has valid values. Rules can be found in the option object, textSettings, selectSettings, fileSettings, dateSettings.
Options might have prices. If option.price is available, use the formatCurrency function from @ikas/storefront to display a formatted price, by using the currency info from the selectedVariant.price.